Public Documents
The Public Documents Portal (PubDocs) for eCode360 is designed to provide a place for Administrators to upload content for accessibility and searchability but does not belong in the code. This content can be made to be available to anyone using the code, and will be included in search results. It can also be made “private” to only logged in eCode360 users from that municipality.
Document Type
eCode360 Administrators can create Document Types that fit the needs of their communities. Common examples include:
- Resolutions
- Minutes and/or Agendas
- Financial Documents
- Comprehensive Plans
- Fee Schedules
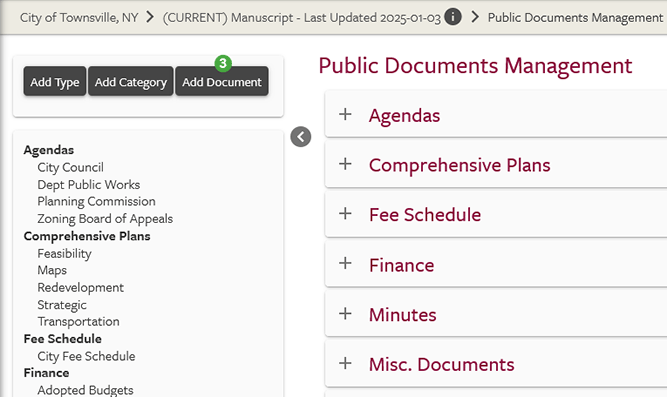
Adding a Type
-
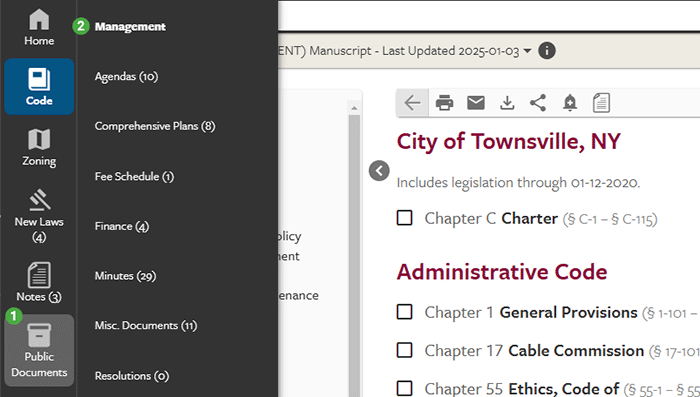
Click Public Documents
-
Click Management
-
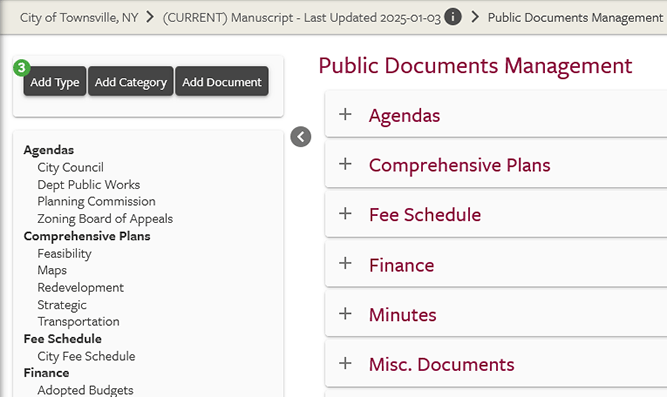
Click Add Type
-
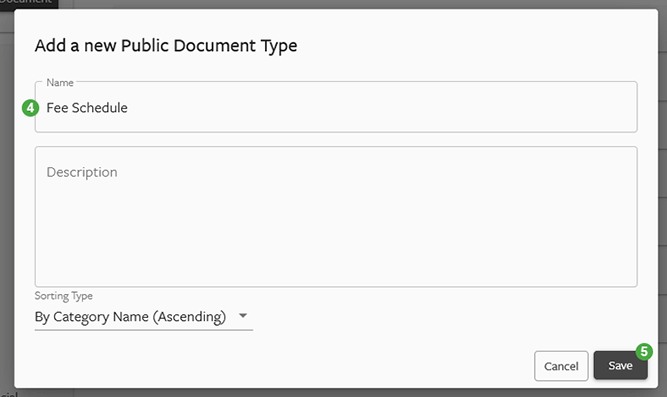
Enter the Name of the Document Type
-
Click Save
Document Category
Within each document type, you have the option to create sub-types or categories. For example, within the "Minutes" document type, you may choose to create categories for "City Council" and "Planning Board", so that the minutes from each type are presented together.- User Tip: When creating categories, keep in mind that PubDocs can automatically sort documents by year if you specify that option in the category settings. This eliminates the need use categories to represent years.
Adding Categories
- Click Public Documents
- Click Management
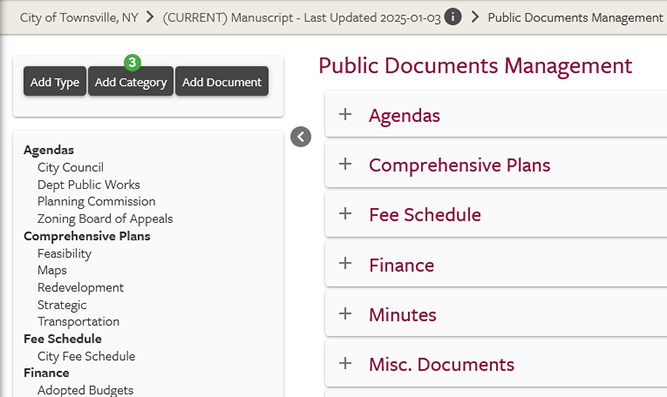
- Click Add Category
- From the Type drop down menu select the Type that you are creating a subcategory in.
- Enter a Title for the Category
- From the Group By: drop down, select By Year (Descending) to put the most current items at the top.
- From the First Sort By: drop down, select Date Descending to put the most current items at the top.
- Click Save.

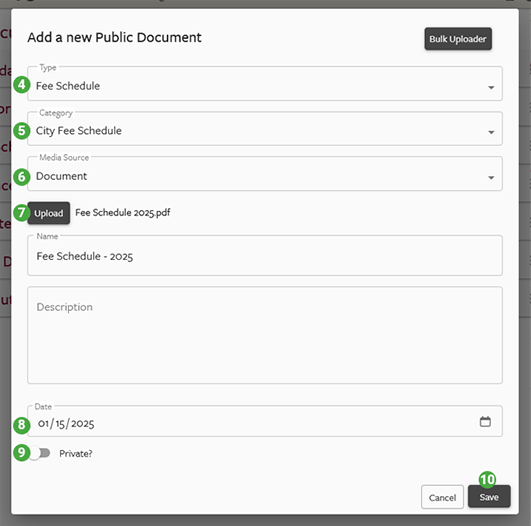
Adding a Public Document
For more information on adding or managing Public Documents, schedule a meeting with one of our eCode360 Trainers here.
- Click Public Documents
- Click Management
- Click Add Document
- From the Type drop down menu select the Type of document are adding.
- From the Category drop down menu select the Category for the document to go in.
- From the Media Source drop down menu select Document, Audio File, Audio Link, or Video Link.
- Click Upload and select the Document, Audio File, or Link for uploading.
- Enter the date the document was approved.
- Click Private if you want the document to be viewable by internal eCode360 users only, leave it alone if you want the document to visible to citizens.
- Click Save.
Click the three vertical dots to edit a:
- Type
- Category
- Document
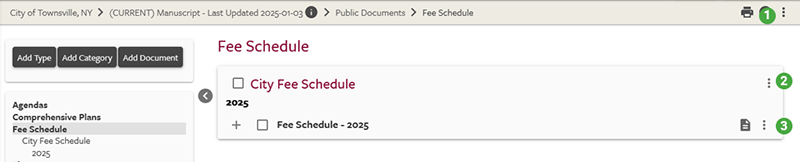
Within the Edit Document pop-up, you can also download the original document in the format that was uploaded.
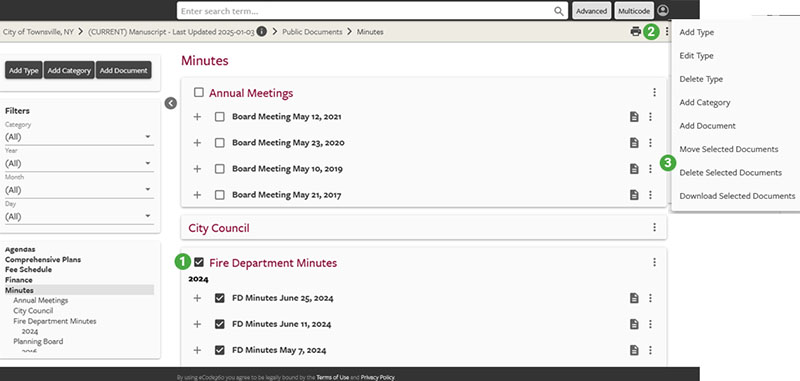
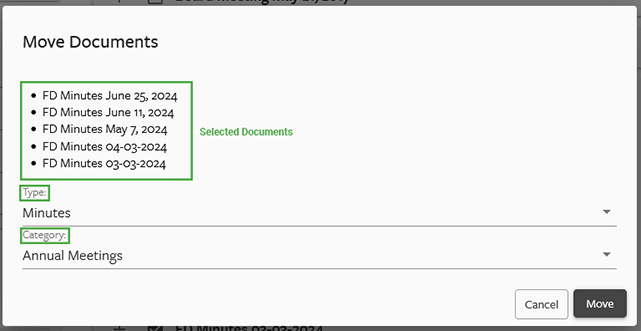
You can move or delete multiple files simultaneously.
- Select the Documents you want to move or delete.
- Click the three vertical dots next to the category.
- Select move or delete. If you choose Move, then you will have the option to fill out the document type/category that you want to move them to.
Supported File types
The following file types are supported by PubDocs at this time:
If you are unsure whether a document will be searchable, you can contact Support for assistance.
These types of documents are NOT supported at this time:
- Text/Documents: .doc, .docx, .docm, .odt, .rtf
- Spreadsheets: .xls, .xlsx, .csv, .ods
- PowerPoint Files: .ppt, .pptx
- Images: .bmp, .jpg/.jpeg, .png, .tif/.tiff
- Most PDF files (depends on how the PDF was created)
- Image files (including, but not limited to .tif, .tiff, .jpg, .png, .gif, .bmp)
- Most documents made from scanners/copiers/multifunction devices
If you are unsure whether a document will be searchable, you can contact Support for assistance.
These types of documents are NOT supported at this time:
- Animated .gif files. These will be converted to PDF, with the first frame of the animation as the only page.
- Executable Files (ie: .exe files)
PubDocs Bulk Uploader
For uploading multiple files at the same time, a Bulk Upload tool is available for an additional one-time charge. Please contact Support for more information. Administrative users who have purchased the Bulk Uploader tool from General Code will see a button for Bulk Uploader in the Add Document dialog box.
Using the Bulk Uploader
For more information on managing Public Documents, schedule a meeting with one of our eCode Trainers here.
- Click Public Documents
- Click Management
- Click Add Document
- Click Bulk Uploader
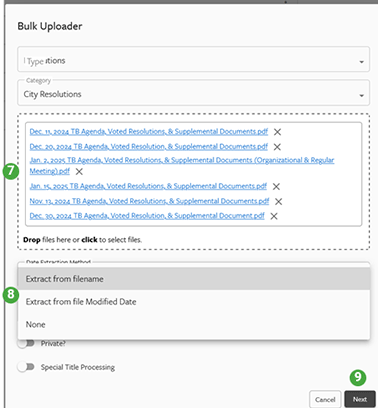
- From the Type drop down menu select the Type of document are adding.
- From the Category drop down menu select the Category for the document to go in.
- Add the files to the “Drop files here or click to select files” field.
- If the date of the document’s approval is in the filename, then leave the “Date Extraction Method” as it is. If the date is not in the filename, then choose “Extract Date from file Modified Date”. You will have a chance to review and change the dates on the next screen.
- Click Next.
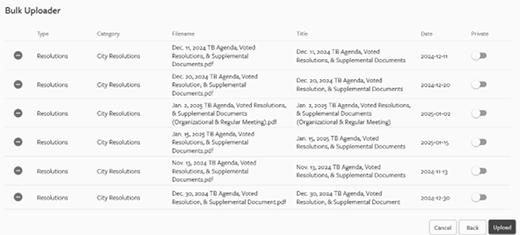
- This screen allows you to review the Type, Category, Filename, Title, Date and whether the document is available to the Public, or private to just logged in eCode360 users. You can click and edit any of this information.
- Click the Upload button.
By default the document title is derived from the filename (the extension is removed). Special Title Processing gives tools to make changes that apply to all the titles.
Title Prefix and Suffix
Below the type and category drop-downs are two entry fields: Title Prefix and Title Suffix. Whatever you enter into these fields is added to the beginning and end of every title.